

Timo van der Kamp
Software developer


In this blog I will guide you to the steps that are required to keep your Atlas CRM data in sync with external sources using our import tool.
First export your data from the external source to a .csv file, below you can find an example for the data that I am using.

To get started I modified my Atlas CRM contact-template to match the data above. See Templates for more information about template configurations. Now let's get started importing this first dataset.

The first step is uploading the data by selecting a CSV file. Before you continue make sure to select the content for this file (companies or contacts). The default delimiter that is used to seperate cells in your CSV is a comma, you can alter this behaviour with the advanced options.

You will now have to tell the import tool which column from the CSV file should be imported in which field of Atlas CRM. You can do this by selecting a CSV column for each template field in Atlas CRM.

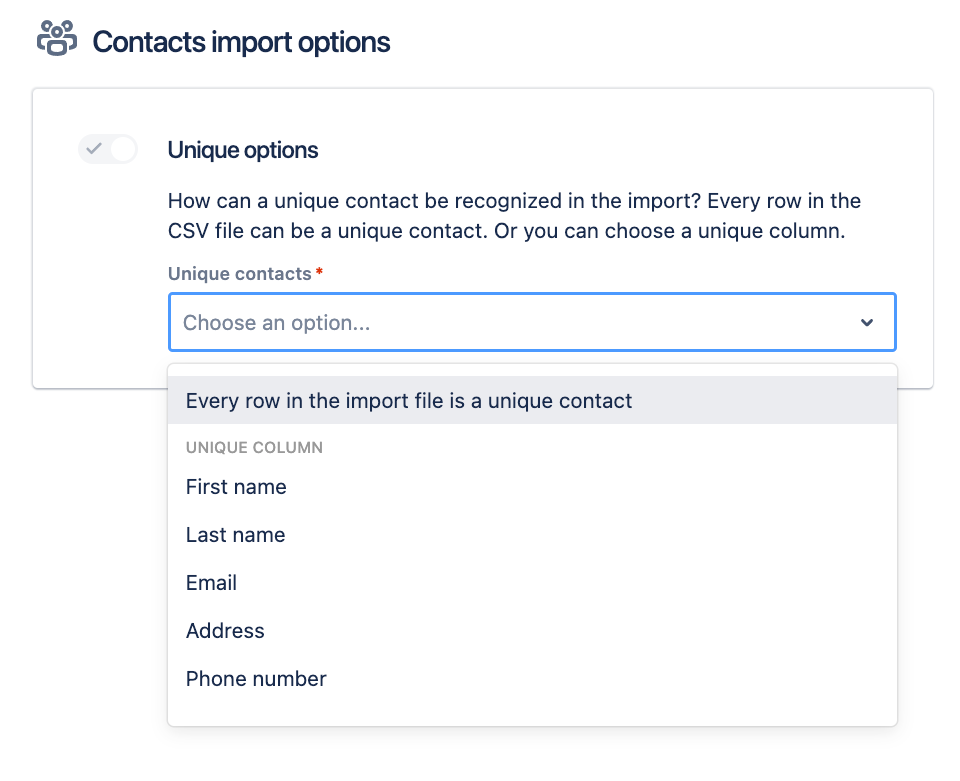
Since I have no existing contacts yet, I won’t see the option to merge with existing data. For now, I only have to clearify if each row is a unique contact and if not, how a unique contact can be identified.
Before you start the import you will get an overview of everything that you have configured during the import process. Once you are satisfied with the configuration, you can press the start button to start the import.

We are now going to sync the external data once again with Atlas CRM. Our data has been updated as shown in the table below.

As you can see, Alex has a new address and we have a new customer called May. For each new import you can repeat step 1 and 2. The only difference is that having existing contacts will result in a different option at step 3.
In step 3 you will have the option to update existing contacts instead of creating a new contact for each CSV row. Specify how to find existing contacts by selecting a template field that matches with the imported contacts. This is often an ID or in this example, the email address.

After starting this import you will see a new record for May and an updated address for Alex. There was a new record created for May William because the import tool could not find an existing contact for the selected template field (Email address).

Start with the merge-import yourself and explore the ease! If there are any questions, find our documentation or contact us.


Avisi Apps B.V.
Nieuwe Stationsstraat 10
6811 KS Arnhem
KvK: 76632490
BTW: NL860713659B01

.svg)
.svg)


We use cookies on our website to enhance your browsing experience. Some of them are essential, others are optional. Because we respect your right to privacy, you can choose not to allow personalized cookies. Learn more
Functional cookies

